Travel photography can sometimes be a daunting experience. With challenges such as unpredictable lighting, hectic timing, and the fact that re-shoots really aren’t an option, it’s no wonder we get overwhelmed. These five tips for better travel photos will help you define your photography goals and see them through.

1. Begin with the End in Mind
Before you go on a trip, decide what the end-goal for your images will be. Are you planning to put them in a scrapbook or blog? Are you simply trying to improve your photography overall? Maybe you’d like to display them on a wall as part of a collage of all your travels? If you think of your images as telling a story, will that change which moments you’ll reach for your camera?
In 2009, shortly after moving to Paris, writer and photographer Nichole Robertson found herself inspired by several objects in a similar shade of red. This led to an amazing collection of Parisian images grouped by color, and eventually turned into a book, Paris in Color.
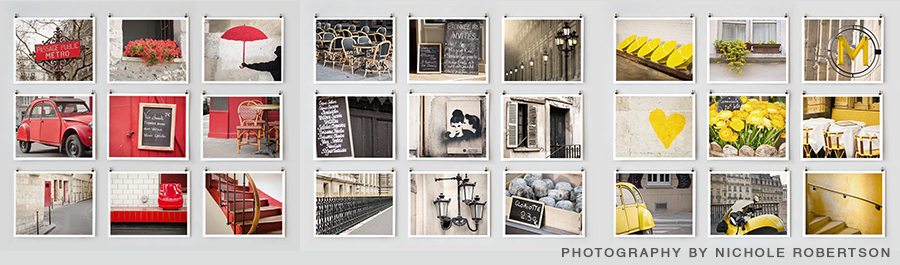
Her project is a perfect example of capturing the city you’re visiting in a completely unique way, all while being true to a vision or plan. Famous monuments can sometimes overshadow the beautiful scenes all around us. But, if you have a direction from the beginning of your trip, you just might change the way you see the world.
Nichole’s beautiful photographs are available for sale in her etsy shop, so those of us who haven’t captured postcard-worthy photos can still decorate with beautiful images from the city of lights.
2. Shoot in RAW – Not JPEG
JPEG is a file format for images. Your camera basically captures a RAW snapshot, and, depending on your camera settings, will automatically compress all the color information down to save space. It will make some adjustments to contrast and saturation, and present you with its best guess as to how the image should look. If you never plan to edit your images with software (such as Photoshop or Lightroom), or simply want to upload them to instagram from your camera, this “best guess” approach might actually be good enough for you.
However, the post-processing capabilities (meaning- what you can do with software later) will be enormously enhanced if you tell your camera to skip the compression step, which allows you to do all the “fixes” yourself. The downsides to shooting in RAW are that it will take up more space, so you’ll need more memory cards; and the files can only be viewed and accessed by using software designed for the task. My favorite program for this is Lightroom, from Adobe (the same guys who make Photoshop).
If editing your images is already part of your photography process (and I’m a firm believer that it should be), then shooting in RAW is a must. If shooting RAW is new for you, there is a bit of a learning curve for processing your images, but it’s worth the payout. One of the biggest fixes that shooting in RAW allows, is for when you overexpose an image by a stop or two. If the image was taken as a JPEG, it could be unrecoverable. Shooting in RAW would allow you to re-expose a lost image in a snap. Since vacation photos aren’t the kind of thing you can just re-take, the ability to salvage an image is freaking amazing.
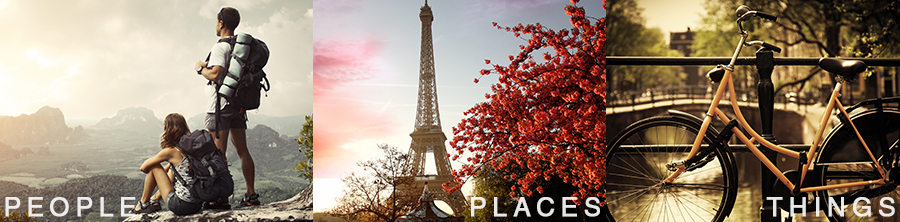
3. Mix up the subjects: People + Places + Things
Back when I first got into photography, I would take lots of nature shots whenever I went on vacation. Because that’s what photographers do, right? Then I would come home and think, Eh. These photos are all boring. Part of the problem was that I didn’t have any photography knowledge yet, so the images really were boring. The other problem is that I actually prefer photos of people, especially people I know. It turns out that a memory card full of nature shots without a person in sight was absolutely useless to me.
The key here is balance. Be sure to capture images of the places you visit, both on a grand scale (capturing wide-shots of sweeping vistas), and a smaller scale (snapping the random things that catch your eye as you wander the streets). Then, of course, you’ll want to photograph the people you’re there with, and be sure to have some shots of yourself, too. Keep this in mind as you work toward your photo goals from tip number 1.
4. Find Your Best Light
While this tip is fourth on the list, I’m going to say that it is probably the most significant way to improve your photos. I remember using my DSLR for the first time: taking it out of the box, wandering around my house and snapping images that I just knew were going to be coffee-table-book-worthy. I was actually surprised to find that my photos looked just the same as the ones off my cell phone. What a waste of $700, right? Then I decided that it must be my house. If I wasn’t taking pictures in such an ugly place, then they’d be post-card-quality.
So I hauled my trusty new camera on my next trip. I figured that by being in a new and magical place, suddenly I would have magical photos. Low and behold… they still sucked. But why? Because the photographer behind my camera (that’s me) still had no idea how to take beautiful photos. I would look at something that seemed so beautiful in person, and not understand why it changed to something boring or even ugly on camera.
It’s all about lighting. Well, okay, maybe a little about composition and understanding how to control your camera’s settings. But perfect composition really can’t rescue a photo with boring light. Or, if it’s a photo of a person, harsh light can be the death of a beautiful image.
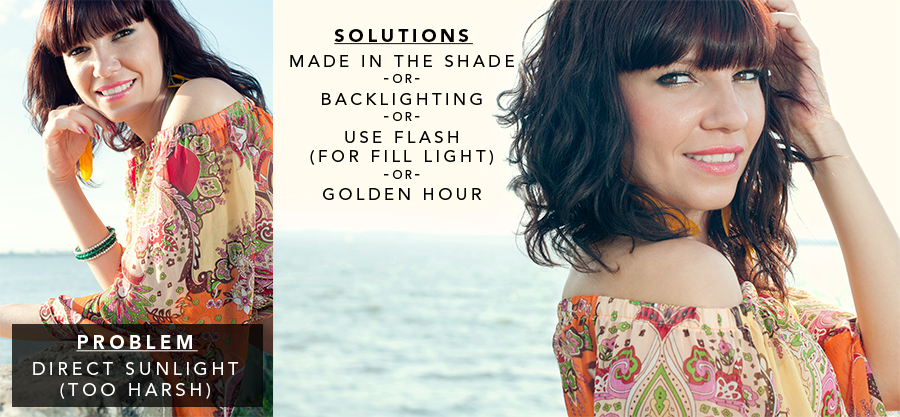
To take better photographs of people, avoid harsh light. You can do this by moving into the shade, or shooting on a cloudy day. If the sun is low enough, you could put your subject between you and the sun, essentially creating shade out of her shadow (the sky will become white behind her). Or, when it gets really close to sunset, you could have your subject look directly towards the sun. Just be sure to watch for shadows: the shadow of her nose, or even your shadow landing right on her. Using flash as a fill light works best if you can get your flash off your camera.( “Fill light” refers to adding light to the dark areas of your subject.) A reflector is a great tool for photographing a person/people out-of-doors, and some even collapse to a fairly travel-friendly disc.
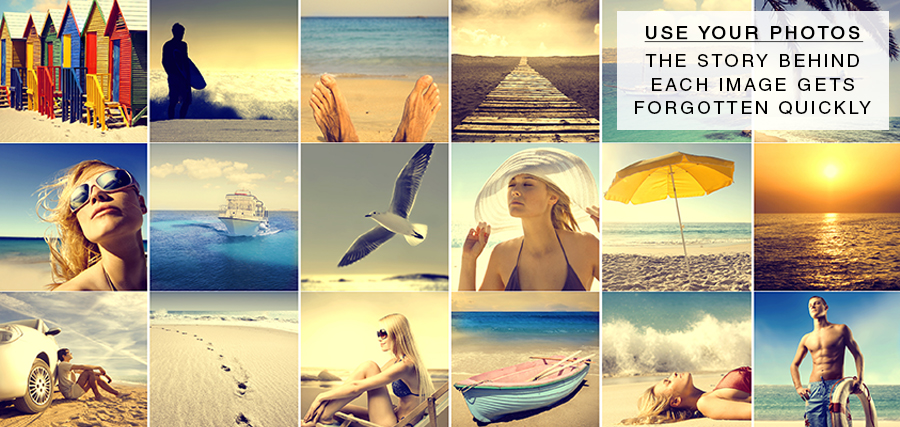
5. Sort and Edit Photos ASAP
When your trip is over and it’s time to return to reality, sometimes using your images ends up on the bottom of the to-do list. Life happens and time goes by until one day, you find yourself telling an epic travel story to your girlfriend over dinner. It was so profound an experience that you knew you would never forget it. Yet, the little details just seem to have slipped away already. In fact, now that you’re thinking on it, many of the big, important parts of the story are lost from your memory as well. It happens so quickly – forgetting all the different places you ate, or side-streets you visited. If you wait too long to go through your pictures, you’ll eventually find yourself staring at your computer and thinking, What the heck is that photo, anyway? Where were we when I took this one? What city were these in? What year was that?
The point is this: you began your trip with a goal, and the trip really isn’t over until you’ve seen your goal through. This is another part of the journey, and being able to chronicle your travels is almost as fun as doing them.
Try to limit the number of photos you use and edit. For example, if you’ll be making a facebook photo album of your trip, keep your photo count to 20 images (or so). Choose only the very best shots from the trip. Or use them to blog, journal, frame, and/or put in an album or adventure book. Don’t just let your images sit on your hard drive, unused, unloved and forgotten.
Start using these tips at home. Go on a photographic stay-cation. Make a goal, wander your neighborhood, look for interesting light and different ways to see your home-town. Get closeups and wide shots; show people, places and things. Come home and put your images on your computer. Then study those images. What is great about them? What could you do differently next time? Choose your favorite 5 and edit them. Rinse. Repeat.


Hi Emily,
I just found your blog via Pinterest and I think it is a really interesting site in the making! Looking forward to reading more styling tip for travellers.
Also, great photography tips. Since I started my blog I started to take more photos to illustrate some posts and indeed, having a purpose has broadened my photographic horizons as I try to capture things I neglected before. For the same reason, I also try to edit them as soon as possible and indeed, it does make a difference to the way I look at my photos now.
Keep up the good work and have a lovely weekend,
Irene
[...] 5 Tips for Better Travel Photos — from Adventure Chic [...]
Hi Emily- Thanks for the photography tips. I’m saving up for a DSLR, but in the meantime I’ll use these tips with my iphoneography.
Found you via Pinterest. Great tips. I have not used to learn raw files, but I am interested!